Category: Plan Your Trip

Practical information for planning a trip to Japan, including travel seasons, budgets, visas and preparation.

  • Japan Luggage Forwarding Guide: How to Use Takkyubin

    Japan Luggage Forwarding Guide: How to Use Takkyubin

    Dragging a large suitcase through a crowded station can turn an otherwise simple journey into the most stressful part of a trip. Japan’s luggage-forwarding services offer a practical alternative: send your bag ahead and travel with only the essentials.

    This guide explains how luggage forwarding—often called takkyubin or takuhaibin—works between hotels, airports and service counters. It also covers timing, forms, common mistakes and what to keep with you while your suitcase is in transit.

    Quick answer: Ask your hotel reception whether it can send luggage to your next accommodation. Show the destination name, address, telephone number and reservation details, complete a shipping form, pay the fee and keep the receipt. Send the bag early enough to allow for delays, and carry one night of essentials separately.

    What Is Luggage Forwarding in Japan?

    Luggage forwarding is a delivery service that transports suitcases, boxes and certain other items from one accepted location to another. Travelers commonly use it between hotels, from an airport to a hotel, or from a hotel to an airport.

    You may hear several related words. Takkyubin is a well-known service name, while takuhaibin is the general Japanese term for parcel delivery. In everyday travel conversations, either may be used to describe sending luggage ahead.

    The service is convenient, but it is not an instant transfer system. Delivery time depends on the route, acceptance time, weather, holidays and the destination’s procedures. Treat the quoted arrival date as an estimate and confirm current conditions when sending your bag.

    When Luggage Forwarding Is Most Useful

    • Changing cities: Send a suitcase from Tokyo to Kyoto and take only a small overnight bag on the train.
    • Using busy stations: Avoid carrying large luggage through ticket gates, stairs and crowded platforms.
    • Taking a side trip: Forward the main suitcase to a later hotel while visiting a rural area with a smaller bag.
    • Traveling with children: Reduce the number of bags that must be managed at the same time.
    • Going to the airport: Send luggage in advance instead of carrying it on local trains on departure day.

    In practice, the service is most valuable when it removes a difficult transfer rather than when it merely saves a few minutes. A route involving two train changes, stairs and a busy terminal is a strong candidate. A direct taxi ride between nearby hotels may not be.

    How to Send Luggage from One Hotel to Another

    1. Confirm That Both Hotels Can Handle the Delivery

    Ask the sending hotel whether it accepts luggage-forwarding requests. Also check that the destination hotel can receive and store the bag before your arrival. Full-service hotels often help, but small inns, vacation rentals and unmanned properties may have different rules.

    2. Allow a Time Buffer

    Do not assume that a suitcase sent in the morning will arrive that evening. Ask the staff for the expected delivery date and build in extra time when the bag contains anything important. Routes to islands, remote areas or destinations affected by bad weather can take longer.

    3. Prepare the Destination Details

    Have the following information ready on your phone or printed reservation:

    • Hotel name
    • Complete address and postal code
    • Telephone number
    • Guest name used for the reservation
    • Check-in date
    • Reservation number, if available

    The reservation name matters. If the suitcase label and hotel booking use different names, reception may have difficulty matching the delivery to your stay.

    4. Complete the Shipping Form

    Staff may complete part of the form or guide you through it. Check the destination, requested delivery date and your contact information before the bag is accepted. If you cannot write Japanese, showing the hotel’s Japanese address usually makes the process easier.

    5. Pay and Keep the Receipt

    The fee depends on factors such as luggage size, route and service type. Payment methods vary by counter. Keep the customer copy of the form because it contains the tracking information you may need if the bag is delayed.

    What to Carry While Your Bag Is in Transit

    Pack as though the suitcase could arrive later than planned. A small backpack or overnight bag should contain:

    • Passport, wallet, tickets and reservation details
    • Medication and necessary medical items
    • Phone, chargers and power bank
    • One change of clothes
    • Basic toiletries
    • Weather-appropriate layer or rain protection
    • Any item needed for the following day

    Never place irreplaceable documents, cash, fragile valuables or something needed immediately after arrival in a forwarded suitcase.

    Sending Luggage from an Airport to Your Hotel

    Major airports have baggage-delivery counters in or near their arrival areas. After collecting your checked luggage and completing arrival procedures, look for a baggage-delivery or courier counter. Show the hotel details, complete the form and ask when the suitcase is expected to arrive.

    This can be especially useful after a long flight, but do not expect every shipment to arrive on the same day. Keep everything required for the first night with you. If your hotel reservation begins that day, tell the hotel that a suitcase is being delivered under your name.

    Sending Luggage from Your Hotel to the Airport

    Airport delivery usually requires more advance planning than an ordinary hotel-to-hotel shipment. Ask your hotel several days before departure about the last acceptable collection date. The bag may need to reach an airport counter well before your flight.

    1. Confirm that your departure terminal is supported.
    2. Check the required arrival date and counter opening hours.
    3. Keep your passport, travel documents, medicine and valuables with you.
    4. Retain the receipt and collection instructions.
    5. Allow time at the airport to locate the correct pickup counter.

    Do not arrange airport forwarding at the last moment. A missed cutoff can leave you without enough time to send the bag before your flight.

    Can You Send Luggage from a Convenience Store?

    Some convenience stores act as parcel drop-off points, but availability depends on the store, carrier, destination and type of luggage. The process can be less straightforward for a first-time visitor than using a hotel desk or staffed service counter.

    If you use a convenience store, bring the destination details in Japanese and be prepared to complete the form yourself. Oversized luggage, airport delivery and special delivery requests may have additional restrictions. When possible, ask hotel staff first.

    How Much Does Luggage Forwarding Cost?

    There is no single nationwide price. The charge varies according to the size and dimensions of the bag, travel distance, destination and selected service. Airport delivery or special handling may cost more than a standard regional shipment.

    Ask for the current total before handing over the suitcase. Prices and conditions can change, so an old online price should be treated only as a rough reference.

    Affiliate placement for later: This is a natural place to recommend a compact overnight bag, luggage scale, suitcase tracker or travel organizer after joining an appropriate affiliate program.

    How Long Does Delivery Take?

    Many common routes require at least overnight delivery, but no universal time applies. Acceptance cutoffs, distance, remote destinations, peak travel periods and severe weather can all affect the schedule. Same-day service is limited and should never be assumed.

    A safer itinerary gives the service an extra day and keeps essential items with the traveler. This is particularly important before a flight, cruise, special event or prepaid activity.

    Items That May Be Restricted

    Acceptance rules vary, but carriers may refuse or restrict cash, valuables, dangerous goods, certain batteries, fragile items, perishable goods, liquids that could leak and luggage exceeding size or weight limits. Ask the counter if you are uncertain.

    Even when an item is technically accepted, consider the consequences if it is delayed or damaged. Keep passports, medication, keys, electronics containing essential data and irreplaceable items in your personal bag.

    Common Mistakes to Avoid

    • Sending the bag too late: Ask about the delivery date before paying.
    • Using an incomplete address: Include the postal code, telephone number and hotel name.
    • Using a different reservation name: Match the label to the booking whenever possible.
    • Assuming every property accepts luggage: Confirm with small hotels, hostels and vacation rentals.
    • Packing all clothing and medicine: Keep an overnight kit with you.
    • Discarding the receipt: Retain the tracking information until delivery.
    • Confusing pickup locations: For airports, verify the terminal and counter.

    Two Practical Itinerary Examples

    Tokyo to Kyoto with an Overnight Stop

    Send your main suitcase from Tokyo directly to the Kyoto hotel. Carry a small bag for one night in Hakone or another stop along the way. Confirm that the Kyoto hotel will accept the suitcase before your check-in date.

    Kyoto Hotel to Kansai Airport

    Ask the hotel about the airport-delivery deadline several days before departure. Send the main suitcase ahead, keep flight documents and essentials with you, and arrive at the airport with enough time to collect the bag from the specified counter.

    Is Luggage Forwarding Worth It?

    For a traveler with one small carry-on and a direct route, forwarding may be unnecessary. For anyone managing a large suitcase, children, mobility limitations or a complicated transfer, it can significantly reduce stress.

    The most useful way to evaluate it is not only by the delivery fee. Consider the stairs avoided, space saved on trains, easier station navigation and freedom to explore before hotel check-in. On the right travel day, those benefits can be more valuable than the cost.

    Frequently Asked Questions

    Can my suitcase arrive before I check in?

    Many hotels will hold luggage for a future guest, but policies vary. Contact the destination and provide the reservation name and check-in date before sending it.

    Can I forward luggage to a vacation rental?

    Only if someone can accept the delivery and the property permits it. Unstaffed accommodation is often unsuitable. Ask the host for specific instructions rather than sending the bag without confirmation.

    Can I choose a delivery date?

    A requested date may be available, but eligible dates and time windows depend on the route and service. Confirm at the counter and allow a buffer for important plans.

    What if my luggage is late?

    Use the tracking information on your receipt and ask the sending hotel or carrier for help. This is why essential medication, documents and the next day’s clothing should remain with you.

    Final Checklist

    • Confirm the destination will accept the bag.
    • Ask for the expected arrival date and allow extra time.
    • Use the same guest name as the hotel reservation.
    • Check the address, telephone number and check-in date.
    • Remove valuables, medicine and urgent items.
    • Photograph the suitcase before sending it.
    • Keep the receipt and tracking number.
    • Tell the destination hotel that luggage is coming.

    Official Resources

    Service details, counters, deadlines and prices can change. Confirm current information before traveling:

    Last updated: August 2026. Always verify current conditions with the hotel or delivery counter.
  • How to Get from Narita Airport to Tokyo: Train, Bus or Taxi?

    How to Get from Narita Airport to Tokyo: Train, Bus or Taxi?

    Arriving at Narita Airport is often the moment when a Japan trip suddenly feels real—and a little complicated. Tokyo is not directly beside the airport, so choosing the right train, bus or taxi can make the first hours of your trip much easier.

    The best option depends less on which service is “best” overall and more on where you are staying, how much luggage you have, when you arrive and how comfortable you are making a transfer.

    Quick answer: Choose the Narita Express for convenient access to Tokyo, Shibuya or Shinjuku; the Keisei Skyliner for fast access to Ueno or Nippori; an airport bus when it stops near your hotel; and a taxi or private transfer when door-to-door convenience matters more than price.

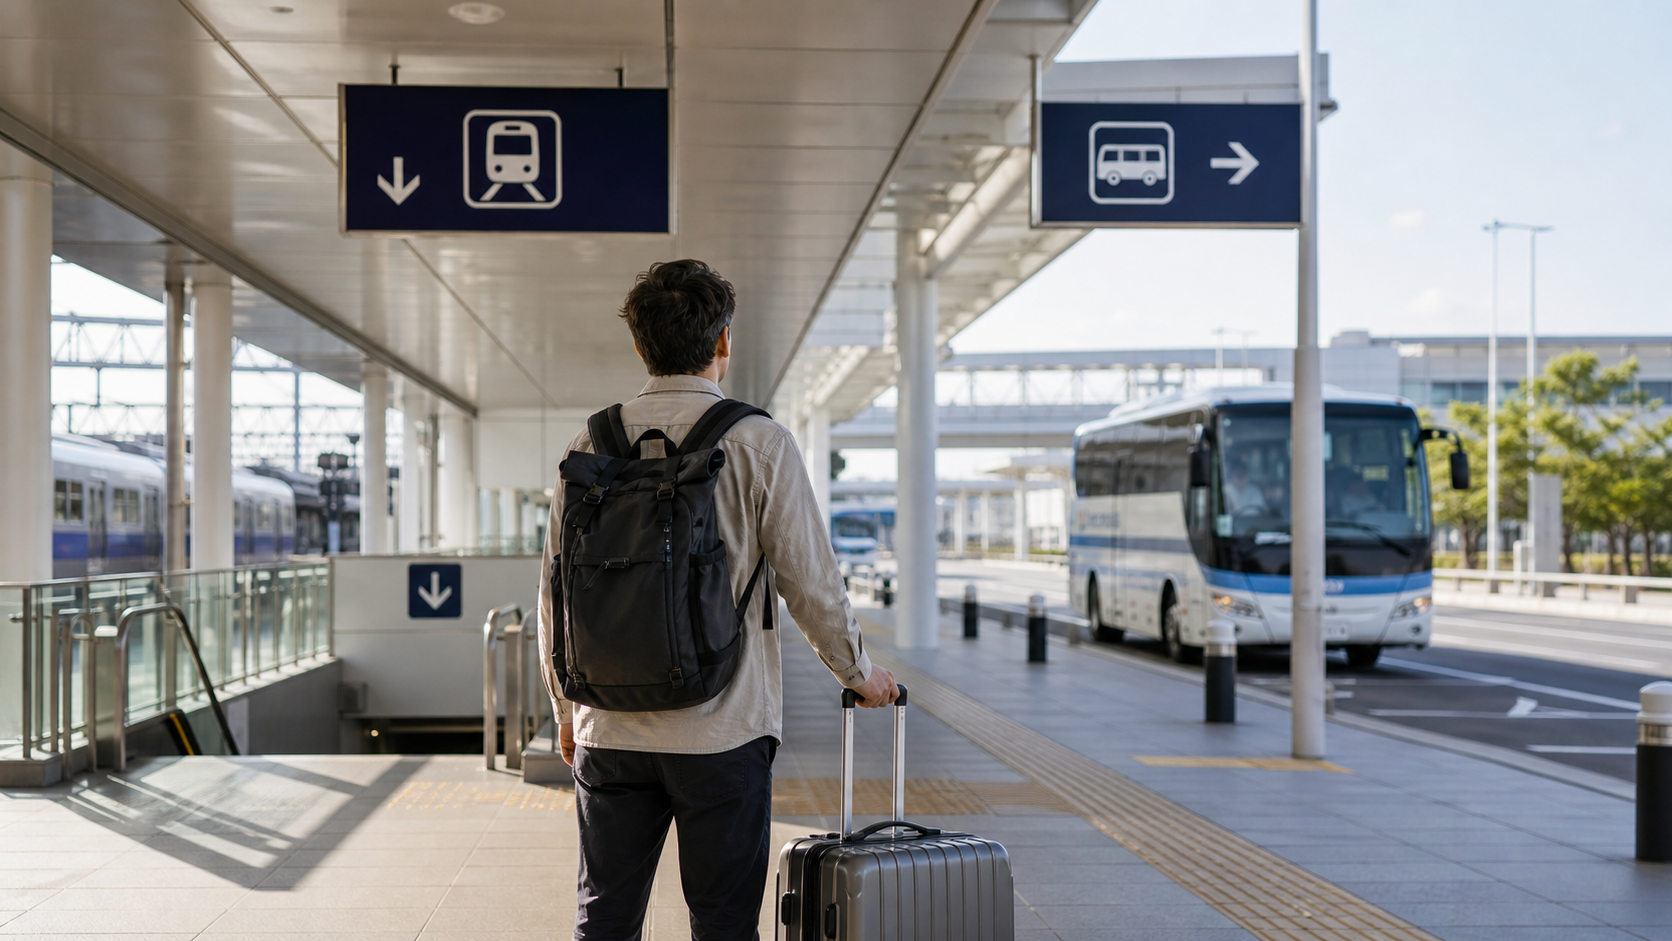
    IMAGE: Insert 01-featured-narita-airport-to-tokyo.png here from the Media Library. Alt text: International traveler comparing train and bus options at Narita Airport

    Before You Choose: Check Your Hotel Location

    Do not choose transportation by looking only at the shortest journey time. First, search for your hotel on a map and identify the nearest major station. A fast airport train can become inconvenient if you still need two subway transfers while carrying luggage.

    A common real-world situation is arriving after a long flight, taking the fastest train into Tokyo and then discovering that the final transfer involves stairs, a crowded platform and a ten-minute walk. A slightly slower bus that stops near the hotel may have been the easier choice.

    OptionUsually best forMain advantageMain drawback
    Narita ExpressTokyo, Shibuya, Shinjuku and selected JR destinationsReserved seats and convenient JR accessMay still require a transfer
    Keisei SkylinerUeno, Nippori and connections to eastern or northern TokyoFast airport railway serviceTerminates on the Ueno side of Tokyo
    Airport busHotels and districts served directlyLittle luggage handling after boardingTraffic can affect journey time
    Low-cost busBudget travel to Tokyo or GinzaSimple and relatively inexpensiveLess space and fewer destination choices
    Taxi or private transferFamilies, groups, late arrivals and heavy luggageDoor-to-door travelUsually the most expensive choice

    Option 1: Narita Express

    The JR Narita Express, commonly called the N’EX, is one of the easiest choices for travelers staying near major JR stations such as Tokyo, Shibuya or Shinjuku. Seats are reserved, luggage areas are available and the onboard environment is designed for airport passengers.

    This option is especially helpful when your hotel is within walking distance of a station served by the train. You avoid navigating local commuter trains immediately after landing, and the reserved seat gives you a predictable place to sit.

    However, check the exact service before boarding. Not every train continues to every destination, and some hotels described as being in “Shinjuku” or “Tokyo” may still be far from the main JR station. If a subway transfer is required, compare the entire door-to-door route rather than only the airport-train segment.

    Option 2: Keisei Skyliner

    The Keisei Skyliner is a strong choice for Ueno, Nippori and areas that connect conveniently from those stations. It is fast, has reserved seating and is often the most efficient rail option for accommodation in northeastern Tokyo.

    Nippori is useful for transfers to the JR Yamanote Line, while Ueno connects with several JR and subway routes. The important detail is the transfer itself. Nippori can be easier than Ueno when your next train is on the Yamanote Line, while Ueno may be better for hotels in the Ueno or Asakusa area.

    First-time visitors sometimes see “fastest” and assume the Skyliner is automatically the fastest route to every part of Tokyo. It is not. It is exceptionally convenient for the Ueno side of the city, but a different service may produce a simpler total journey to western Tokyo.

    Option 3: Airport and Low-Cost Buses

    Airport buses serve major stations, hotels and districts across Tokyo. They are worth checking whenever a stop is close to your accommodation. Your large bag is placed in the luggage compartment, so you can sit down and avoid carrying it through railway gates and station corridors.

    The trade-off is traffic. Travel time can be less predictable during busy periods, accidents or bad weather. Still, after a long overnight flight, a direct bus can feel easier than a theoretically faster journey involving multiple transfers.

    Low-cost buses also operate to central destinations such as Tokyo and Ginza. Narita Airport currently lists fares around ¥1,500 for some of these services, but fares and schedules can change. Check the official airport page before travel rather than relying on an old screenshot or blog post.

    Option 4: Taxi or Private Airport Transfer

    A taxi from Narita to central Tokyo is convenient but expensive because the airport is a considerable distance from the city. Fixed-fare taxi zones are available, although expressway tolls and late-night or early-morning surcharges may be added. Depending on the destination, the total can exceed ¥20,000.

    The cost may be reasonable for a group sharing one vehicle, a family traveling with small children or someone carrying several large bags. It can also be valuable after the last practical train or bus has departed. Confirm the vehicle size if your group has multiple suitcases; passenger capacity and luggage capacity are not always the same.

    Use an official taxi stand or a reputable pre-booked transfer. Avoid accepting unsolicited transportation offers inside the terminal.

    Which Station Should You Use at Narita Airport?

    • Terminal 1: Use Narita Airport Terminal 1 Station.
    • Terminal 2: Use Airport Terminal 2·3 Station.
    • Terminal 3: Use Airport Terminal 2·3 Station and allow time to walk between the terminal and station.

    Narita Airport advises that the walk is approximately five minutes from Terminal 2 and about ten minutes from Terminal 3. Allow more time if you have children, heavy luggage or need to find a ticket counter.

    Three Realistic Arrival Scenarios

    Staying near Shinjuku Station

    The Narita Express is usually the first option to compare because it can provide direct JR access. If the hotel is far from the station, also check whether an airport bus stops closer. A direct bus may save a difficult final walk even if its scheduled journey is longer.

    Staying near Ueno or Asakusa

    The Skyliner is often convenient for Ueno and Nippori. For Asakusa, compare the transfer from Ueno with other Keisei services and airport buses. The simplest option varies with your exact hotel location.

    Arriving late with two large suitcases

    Check the final departure times before the flight. If a direct bus is still operating, it may be the least stressful option. If public transportation has ended, an official taxi or pre-booked transfer may be necessary. Do not assume Tokyo’s trains run all night.

    Traveling with Luggage, Children or Reduced Mobility

    With one manageable suitcase, trains are normally straightforward. With several large bags, a stroller or a tired child, every transfer becomes more important. Check whether the destination station has elevators near the exit you need, not merely whether the station has elevators somewhere.

    Airport buses minimize the number of times you handle large luggage. Reserved airport trains provide a reliable seat but may still leave a final subway ride or walk. A private transfer offers the least physical effort but costs considerably more.

    A Simple Plan for Your First Hour After Landing

    1. Complete immigration, collect your luggage and pass through customs.
    2. Connect to the airport Wi-Fi or activate your eSIM.
    3. Confirm your hotel address and nearest station in English and Japanese.
    4. Check the live departure time and destination of your preferred service.
    5. Buy the correct ticket or bus reservation before entering the platform or boarding area.
    6. Keep your ticket and passport accessible, but secure your wallet and other valuables.
    7. Send your hotel a message if a delayed flight will cause a late check-in.

    Save the hotel address and route before leaving the terminal. Mobile reception can become inconvenient at exactly the moment you need to identify the correct station exit.

    Common Mistakes to Avoid

    • Choosing the fastest airport train without checking the final transfer.
    • Confusing Narita Airport with Haneda Airport.
    • Buying a ticket for the wrong operator or service.
    • Assuming every train stops at the same Tokyo stations.
    • Ignoring the last departure time after a late flight.
    • Underestimating the difficulty of stairs and long station corridors with luggage.
    • Using an unofficial taxi offer instead of the designated stand.

    Frequently Asked Questions

    Is the Narita Express or Skyliner better?

    Neither is universally better. The Narita Express is often more convenient for Tokyo, Shibuya and Shinjuku, while the Skyliner is particularly useful for Nippori and Ueno. Compare the route all the way to your accommodation.

    Can I use an IC card from Narita Airport?

    IC cards are useful for many local journeys, but limited express and reserved-seat services may require a separate limited-express or reserved-seat ticket. Follow the instructions for the specific service you choose.

    Should I book airport transportation in advance?

    Advance booking can reduce uncertainty, especially during busy travel periods or when arranging a private transfer. However, flight delays can complicate tightly timed bookings. Review the change and cancellation conditions before paying.

    What if my flight arrives very late?

    Check the day’s final train and bus departures using official sources. If you cannot reach your hotel safely, compare an official taxi, a pre-booked transfer or an airport-area hotel. Do not rely on an itinerary that assumes trains operate all night.

    Final Recommendation

    For most first-time visitors, the easiest choice is the service that reaches the nearest useful station—or the hotel itself—with the fewest difficult transfers. Choose the Narita Express for convenient JR destinations in central and western Tokyo, the Skyliner for Ueno or Nippori, a bus for a direct hotel-area stop and a taxi or private transfer when comfort and simplicity justify the cost.

    Fares, timetables, stops and operating conditions can change. Confirm your route on the official Narita Airport and transport-operator websites shortly before travel.

    Official Resources

    Disclosure: This article may later contain affiliate links. If you make a qualifying booking through such a link, Easy Japan Compass may receive a commission at no additional cost to you. Recommendations are based on practical suitability for travelers, not commission rates.

  • Japan eSIM vs Pocket WiFi: Which Is Better for Your Trip?

    Japan eSIM vs Pocket WiFi: Which Is Better for Your Trip?

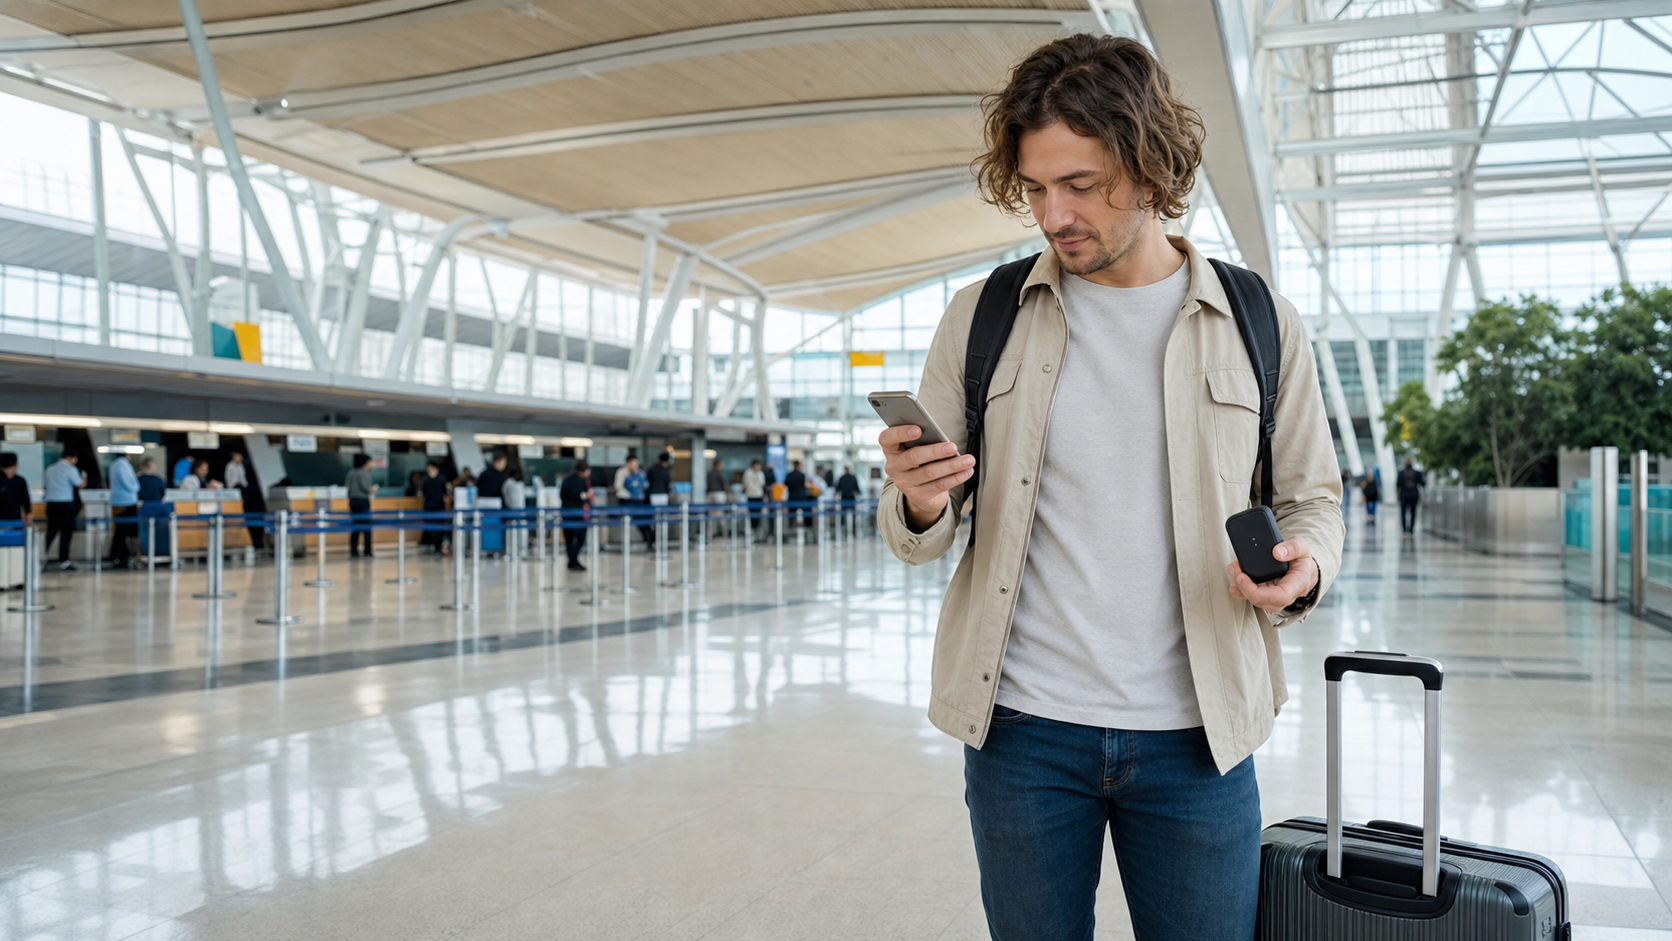
    Staying connected in Japan makes almost every part of a trip easier. You can check train platforms, open digital tickets, translate a restaurant menu, confirm hotel details and find your way back after taking the wrong station exit.

    For most international visitors, the choice comes down to two options: a travel eSIM installed on a phone or a pocket WiFi router carried throughout the day. Both can work well, but they suit different devices, group sizes and travel habits.

    Quick answer: Choose an eSIM if you are traveling alone, have an unlocked compatible phone and want the simplest setup. Choose pocket WiFi if several people or devices need to share one connection. Whichever option you choose, arrange it before arrival and carry a backup plan for navigation and booking details.

    The Short Answer

    Choose an eSIM when…Choose pocket WiFi when…
    You are traveling aloneTwo or more travelers will share data
    Your phone supports eSIM and is unlockedYour phone does not support eSIM
    You want internet without carrying another deviceYou need to connect a laptop, tablet or several phones
    You do not want to collect or return equipmentYou prefer one shared data plan for the group
    You can manage installation on your phoneYou want familiar WiFi-style setup

    The cheapest advertised option is not always the most convenient. A small price difference matters less than having a connection that works when you are standing in a large station, tired after a flight and trying to find the correct train.

    What an eSIM Feels Like During a Japan Trip

    An eSIM is a digital mobile plan installed directly on a compatible phone. There is no physical SIM card to insert and no router to charge. After activation, your phone connects to a Japanese partner network and uses mobile data much like it does at home.

    In practice, the main advantage becomes clear as soon as you leave the airport. You can put your phone in your pocket and continue traveling without checking whether a separate router is switched on, charged or still inside your bag. This is especially convenient on crowded trains, during day trips and whenever you are moving with luggage.

    Installation methods vary by provider. You may scan a QR code, use the provider’s app or enter activation details manually. Some plans can be installed before departure and activated after arrival. Others begin their validity period as soon as installation or network connection occurs, so read the provider’s instructions before scanning anything.

    Main advantages of an eSIM

    • No collection counter or equipment return
    • No extra router or charging cable to carry
    • Each traveler keeps an independent connection
    • Easy to use while walking, changing trains or separating from a group
    • Your normal physical SIM may remain in the phone, depending on the device

    Possible disadvantages of an eSIM

    • Your phone must support eSIM and normally needs to be carrier-unlocked
    • Setup can feel stressful if attempted for the first time after landing
    • Each traveler usually needs a separate plan
    • Hotspot or tethering rules vary between plans
    • Accidentally leaving your home line’s data roaming enabled may create charges

    The safest approach is to confirm compatibility, save the installation instructions offline and complete any permitted pre-installation while you still have reliable internet at home.

    What Pocket WiFi Feels Like During a Japan Trip

    Pocket WiFi is a small portable router. It connects to a mobile network and creates a private WiFi network for your phones, tablets and computers. You normally collect it at an airport counter, hotel or delivery address, then return it in a prepaid envelope or at a designated location.

    The practical benefit is easy to understand when two people travel together. Both phones can connect to one router, and a laptop can use the same connection at the hotel. The trade-off appears when the group separates. The person carrying the router keeps the connection, while everyone else may be left without data.

    A common arrival-day problem is forgetting that the router itself needs power. Long navigation sessions, video calls and several connected devices can drain its battery. For a full sightseeing day, keeping the router charged often means carrying a power bank and cable as well.

    Main advantages of pocket WiFi

    • Several travelers and devices can share one connection
    • Setup feels familiar: switch it on and enter a WiFi password
    • Useful for laptops, tablets and phones without eSIM support
    • Can be economical for a group that stays together
    • Does not require changing the phone’s mobile-plan settings

    Possible disadvantages of pocket WiFi

    • The router must be carried and charged every day
    • People who separate from the router lose the connection
    • Pickup and return instructions add another task to the trip
    • Late returns, loss or damage may lead to additional charges
    • Performance may slow when many devices use data at once

    eSIM vs Pocket WiFi: Side-by-Side Comparison

    FeatureeSIMPocket WiFi
    Best forSolo travelers and independent usersCouples, families and multiple devices
    EquipmentNo separate devicePortable router and charging cable
    SetupInstall on a compatible unlocked phoneConnect to a WiFi network
    Group separationEach person with a plan stays connectedConnection stays with the router
    Battery useUses the phone batteryRouter and phone both need power
    Pickup and returnUsually unnecessaryUsually required
    Laptop useOnly if tethering is allowedNormally straightforward
    Loss riskNo rental device to loseLoss or damage fees may apply

    Choose Based on How You Actually Travel

    Solo traveler

    An eSIM is usually the simplest choice. You do not need to share data, and removing one device from your daily checklist is useful when you are managing luggage, tickets and directions alone.

    Couple or group staying together

    Pocket WiFi can be good value when everyone follows the same itinerary. However, decide who will carry and charge it. If one person goes shopping while another returns to the hotel, only one side keeps the shared connection.

    Family with children and several devices

    A pocket router may be easier for connecting several phones and tablets. Check the provider’s device limit and data policy, particularly if passengers will stream video during long train journeys.

    Travelers who may separate

    Individual eSIMs are safer. Independent connections make it easier to change plans, meet at a different exit or contact each other after becoming separated inside a major station.

    Working during the trip

    If a laptop connection is essential, confirm tethering rules before purchasing an eSIM. Pocket WiFi is often more convenient for several devices, but neither option should be treated as a guaranteed replacement for a secure and stable business connection.

    Before You Buy: Three Checks That Prevent Most Problems

    1. Confirm that your phone supports eSIM

    Support depends on the model, country and carrier. Do not rely only on the model name: some regional versions differ. Check the device settings and the manufacturer’s official support page. If your phone is locked to a carrier, a travel eSIM may not work even when the hardware supports it.

    2. Read the activation and validity rules

    Find out exactly when the plan begins: purchase, installation, activation or first connection in Japan. Save the QR code and instructions somewhere available offline, but remember that many QR codes can only be used once.

    3. Check the data policy, not just the headline allowance

    “Unlimited” can still include fair-use restrictions, daily high-speed limits or slower speeds after heavy use. Check coverage, tethering permission, support hours and what happens when the high-speed allowance is exhausted.

    Battery, Charging and Backup Plans

    Navigation, translation, photography and ticket apps can consume more battery than expected. With an eSIM, the phone is the single point of failure. With pocket WiFi, you must keep both the router and phone alive. A compact power bank and the correct cables are useful with either option.

    Before leaving the hotel, take screenshots of the day’s important information: hotel address, reservation numbers, destination names in Japanese and the route back. Download an offline map for the main area. These small preparations remain useful even when mobile service is working normally.

    Connectivity also works best alongside basic transport preparation. Read our Japan Train Guide for First-Time Visitors and our guide to using Suica, PASMO and ICOCA.

    Which Option Should You Choose?

    Choose an eSIM if you have a compatible unlocked phone, want the least equipment and expect to move independently. It is usually the most convenient option for a solo traveler.

    Choose pocket WiFi if several devices need access, your group will remain together or your phone cannot use eSIM. It can also be useful when you need a familiar WiFi connection for a laptop.

    Consider a backup combination when internet access is particularly important. For example, one traveler can use a small eSIM plan while the group shares pocket WiFi. This costs more, but it prevents the entire group from losing access if the router battery runs out or the travelers separate.

    Compare Japan Connectivity Options

    Affiliate disclosure: Some links in this section may be affiliate links. If you make a qualifying purchase, Easy Japan Compass may receive a commission at no additional cost to you. Recommendations should be based on suitability, not commission.

    When comparing eSIM plans, check supported devices, network coverage, validity period, high-speed data, tethering and customer support.

    When comparing pocket WiFi rentals, check pickup and return locations, battery specifications, device limits, fair-use rules and loss or late-return charges.

    Frequently Asked Questions

    Can I buy an eSIM after arriving in Japan?

    Usually, yes. However, purchasing and activating one requires internet access. Preparing it before departure is often easier than troubleshooting it on airport WiFi after a long flight.

    Can I keep my normal phone number?

    Many dual-SIM phones can keep the home line enabled while using the travel eSIM for data. Check your settings carefully because calls, messages or data on the home line may create roaming charges.

    Does pocket WiFi work on the Shinkansen?

    It normally works wherever the underlying mobile network has coverage, but signal strength may vary in tunnels, rural areas and fast-moving trains. The same limitation can affect an eSIM.

    How much data do I need?

    Maps, messaging, web searches and translation generally use much less data than streaming video, cloud backups or video calls. Moderate travelers often need only a few gigabytes per week, but usage varies widely. Disable automatic photo backups and app updates if you want to conserve data.

    Is free public WiFi enough?

    Public WiFi is useful as a backup but is not dependable enough to be the only connection for most trips. Availability, sign-in procedures and performance vary, and open networks require normal security caution.

    Final Recommendation

    For a solo visitor with a compatible unlocked phone, an eSIM is usually the easiest answer. For a family, group or traveler carrying several devices, pocket WiFi may offer better value and simpler sharing.

    The best option is the one that fits your actual travel pattern. Confirm compatibility, arrange service before departure, save essential information offline and carry enough battery power for a long sightseeing day.


    Device setup references: Apple: Use eSIM while traveling internationally · Google: Learn about eSIM on Pixel phones · Samsung: Galaxy eSIM support

  • How to Use an IC Card in Japan: Suica, PASMO and ICOCA Guide

    How to Use an IC Card in Japan: Suica, PASMO and ICOCA Guide

    Japan’s IC cards make everyday travel much easier. Instead of buying a paper ticket for every ride, you can tap one card at a ticket gate, board most local trains and buses, and pay at many convenience stores, vending machines and station shops.

    For most visitors, the names Suica, PASMO and ICOCA describe cards that work in almost the same way. The main difference is where they are issued—not where you can normally use them.

    Quick answer: Buy whichever major IC card is easiest to obtain when you arrive. For ordinary travel, you usually do not need a different card for Tokyo, Kyoto and Osaka.

    What Is an IC Card?

    An IC card is a rechargeable contactless payment card. You add money to the card in advance, then touch it to a reader when entering and leaving a railway station. The system calculates the fare and deducts it from the balance.

    The same card can also be used on many buses and for small purchases displaying the relevant IC payment symbol. This is especially useful when you are tired, carrying luggage or trying to board a train during a busy period. You do not need to study the ticket machine’s fare map before every short journey.

    Suica, PASMO and ICOCA: What Is the Difference?

    CardMain issuing regionTypical visitor use
    SuicaJR East area, including TokyoTrains, buses and shopping in participating IC networks
    PASMOPrivate railways and subways around TokyoVery similar everyday coverage to Suica
    ICOCAJR West area, including Osaka and KyotoVery similar everyday coverage to Suica and PASMO

    Japan’s major transport IC cards are interoperable across a large national network. In practice, a Suica bought in Tokyo can usually be used on participating transport in Osaka, Kyoto and many other cities. Likewise, an ICOCA bought in Osaka can usually be used around Tokyo.

    This means most short-term visitors should choose based on convenience. If the machine at your arrival station sells ICOCA, buying ICOCA is normally easier than searching for Suica. The logo on the card matters much less than having enough balance and knowing the few journeys that require a separate ticket.

    Which IC Card Should You Choose?

    Arriving in Tokyo

    Suica or PASMO is the natural choice. Either works well for most ordinary train, subway and bus journeys in the Tokyo area. If a visitor version is available, read its validity and refund conditions before buying rather than assuming it works exactly like a standard card.

    Arriving in Osaka or elsewhere in the JR West area

    ICOCA is usually the simplest choice. It can be used on participating transport in Kansai and across compatible IC networks elsewhere in Japan. A standard physical ICOCA normally includes a ¥500 deposit, so the amount available for travel is lower than the total amount paid at purchase.

    Visiting several cities

    Keep using the same compatible card. You generally do not need to buy a new one simply because you travel from Tokyo to Kyoto or Osaka. However, IC interoperability does not mean every journey in Japan can be completed as one continuous tap-in/tap-out trip. Separate IC service areas and special trains can still require another ticket or a different procedure.

    Physical Card or Mobile IC Card?

    Physical card

    • Simple to understand and easy to share among different phone ecosystems.
    • Can usually be recharged with cash at compatible ticket machines.
    • Does not depend on your phone’s battery.
    • Each traveler needs their own card when passing through ticket gates.

    Mobile card

    Compatible Apple devices can support Japanese transit cards such as Suica, PASMO and ICOCA in Apple Wallet. Express Transit can allow you to tap without unlocking the device. Compatibility, supported payment cards and setup options vary by device and country, so complete the setup before relying on it for an important journey.

    A mobile card is convenient because you can check the balance on your screen and may be able to add value without finding a cash recharge machine. A physical card is still a sensible choice if your phone is incompatible, you prefer cash, or you do not want transport access tied to one device.

    Where to Buy an IC Card

    Physical cards are commonly sold at participating railway ticket machines and service counters. Availability can change, particularly for limited visitor products, so check the issuing operator’s official information if you need a specific card.

    1. Find a ticket machine displaying the IC card name or logo.
    2. Choose English on the language screen.
    3. Select the option to purchase a new card.
    4. Choose the initial stored value.
    5. Pay using an accepted method and collect both the card and any change.

    Keep the card somewhere easy to reach but separate from other contactless cards. If two cards are presented to the reader together, the gate may not know which one to charge.

    How to Recharge Your IC Card

    Recharge is often called charge in Japan. At a station machine, place or insert the card as shown, choose the amount, pay and wait for the machine to confirm the new balance. Many machines accept cash, and some have a tray rather than a card slot.

    • Recharge before entering the gate if your balance is low.
    • Keep some cash available because not every machine accepts foreign bank cards.
    • Convenience stores can often add value to major IC cards; ask the cashier for an IC card charge.
    • The maximum stored balance varies by product; standard ICOCA, for example, has a maximum stored value of ¥20,000.

    A useful habit is to check the balance shown briefly on the gate display after each tap. Adding a few thousand yen at a time is usually more practical than loading a very large amount near the end of a trip.

    How to Use an IC Card on Trains

    1. Confirm that your station and route accept your card.
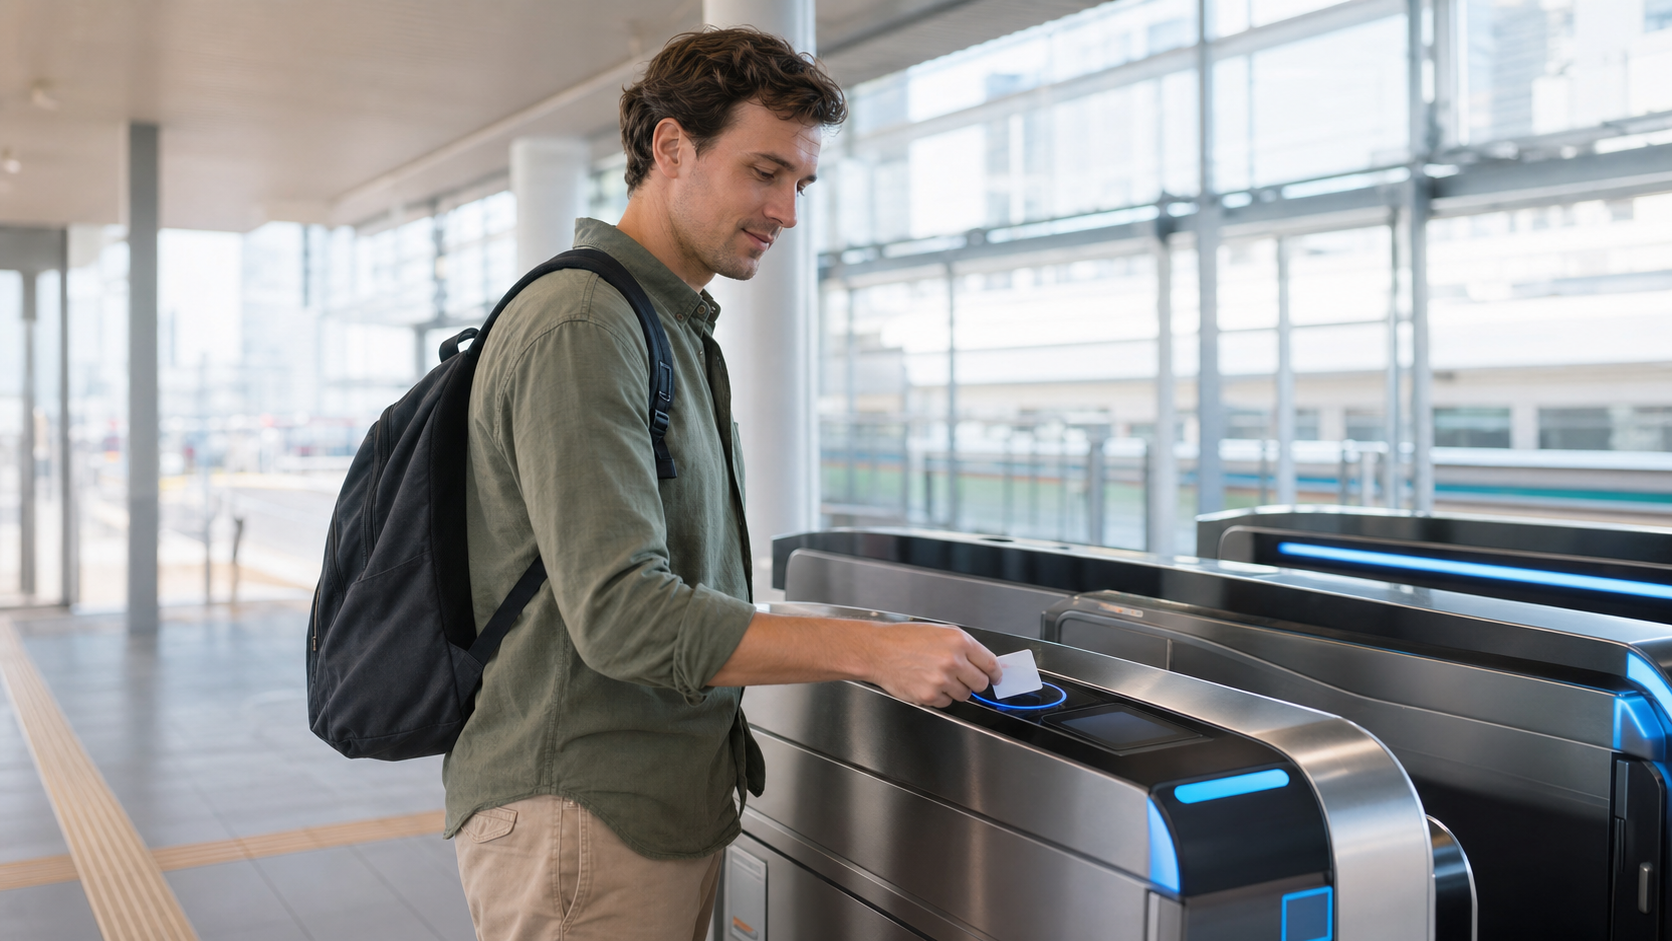
    2. At the entrance gate, touch the card or phone flat against the illuminated reader.
    3. Wait for the confirmation sound and open gate.
    4. Keep the same card or device for the entire journey.
    5. At your destination, tap the same card at the exit gate.

    Do not wave the card quickly above the reader. A deliberate touch for a moment is more reliable. If the gate closes, step aside instead of repeatedly pushing forward. Look at the small display for an error or ask station staff for help.

    If you entered with a physical card, exit with that card—not a mobile version or another card from your wallet. The system needs to match the entry and exit records.

    How to Use an IC Card on Buses

    Bus procedures vary. Some buses require a tap when boarding and another when leaving. Others charge a flat fare and require only one tap. Watch what local passengers do, look for the IC reader, and follow the English signs when available.

    If you are unsure, show the card to the driver before tapping. This is safer than assuming that every bus follows the same procedure.

    Using IC Cards in Shops and Vending Machines

    Major IC cards can be used for small purchases at many convenience stores, kiosks, lockers, restaurants and vending machines. Look for an IC payment logo near the register or card reader.

    1. Tell the cashier you want to pay by IC card, or select the IC option on the payment screen.
    2. Touch the card or phone to the reader.
    3. Wait for the confirmation sound before removing it.

    This can be an efficient way to use a small remaining balance, but do not deliberately empty the card before your final train ride. It is useful to retain enough value for an unexpected transfer or airport journey.

    Important Limitation: Shinkansen and Limited Express Trains

    A normal stored-value IC card does not automatically replace every ticket. Shinkansen services, limited express trains and reserved seats may require a separate base fare, express ticket, seat reservation or advance linkage to a booking service.

    If a train has a reserved seat number, a limited express name or a Shinkansen platform, do not assume that one ordinary IC tap covers the entire journey.

    Check the operator’s instructions for that specific train. You may still tap an IC card as part of the process, but another ticket can be required.

    Do Not Travel Across Separate IC Areas Without Checking

    National interoperability allows the same card to be used in many regions, but it does not turn all participating areas into one continuous fare zone. A very long local-train journey may cross an IC area boundary that cannot be settled automatically at the destination.

    For an intercity journey, check the route before tapping in. Buying a paper ticket may be easier, and Shinkansen is often the more practical option between major cities.

    What to Do When the Ticket Gate Rejects Your Card

    Low balance

    Use a fare adjustment or recharge machine before trying the exit again. At smaller stations, ask an attendant.

    Incomplete journey record

    This can happen if you entered or exited through a staffed passage without the expected tap, or if a previous trip did not close correctly. Take the card to station staff and explain your previous origin and destination. Do not attempt to fix the record by tapping repeatedly.

    Two cards detected

    Remove the IC card from a wallet containing other contactless cards and tap it by itself.

    Unsupported route or service

    Some rural lines, highway buses and special services do not accept every IC card. Confirm acceptance before boarding when traveling outside major urban networks.

    A Practical First-Day Routine

    1. Get one compatible card for each traveler.
    2. Add enough value for the first day, but avoid overloading it.
    3. Store it where it can be tapped separately from bank cards.
    4. Check the balance after leaving each station.
    5. Recharge before the morning rush or before entering a rural area.
    6. Keep cash as a backup.

    This routine removes many small decisions from a travel day. The card will not plan the route for you, but it lets you focus on the platform, direction and destination rather than buying a new ticket for each ride.

    Frequently Asked Questions

    Can two people use one IC card?

    Not for the same train journey. Each person needs a separate card because the system records an individual entry and exit.

    Can I use Suica in Kyoto and Osaka?

    Usually yes on participating IC transport and payment networks. Check the specific operator for rural routes or special services.

    Can I use ICOCA in Tokyo?

    Usually yes on participating services that accept the nationwide interoperable IC cards.

    Can I recharge with a foreign credit card?

    Do not rely on it. Physical-card recharge machines commonly accept cash, while mobile-card payment compatibility depends on the device, wallet and card issuer.

    Should I refund the card before leaving Japan?

    Refund conditions depend on the product and issuing operator. Some visitor cards have a fixed validity period and do not refund unused stored value. Standard cards may have deposit and fee rules. Check the current official terms before deciding.

    Final Advice

    Do not spend too much time choosing between Suica, PASMO and ICOCA. For most visitors, the best card is the compatible one available at the station where the trip begins.

    Learn three habits: tap the same card at entry and exit, check the balance, and verify special or long-distance journeys before boarding. With those habits, an IC card becomes one of the simplest and most useful tools for traveling around Japan.


    Official Information